今回は、SpringフレームワークとSpringセキュリティを使って、Basic認証する手順についてご紹介したいと思います。
はじめに
ベーシック認証(Basic認証)とは、Webページの特定領域にアクセス制限をかけることができる認証方式です。
Basic認証をかけると、Webページにアクセスする際に、idとパスワードを入力するダイアログが表示されます。入力したidとパスワードが、サーバー側に登録されたものと一致しなければ、ページ自体が表示されません。
Basic認証をかけるとクローラーにも認識されないようになり、本当に特定の人を対象としたWebページを作成する場合に利用されます。
ただ、Basic認証で入力するidとパスワードは、可逆な(元に戻すことのできる)Base64という暗号方式で通信されるため、傍受されるとidとパスワードが筒抜けになってしまう危険があります。
そのため、Basic認証はhttpsとセットで利用する必要があります。
httpsをセットで用いるのは、https通信にしておけば、通信内容自体が暗号化されるからです。http通信では、暗号化されません。
pom.xmlに依存関係の追加
Spring Bootフレームワークを使わないSpringフレームワークでSpringセキュリティを使う場合の最小依存関係は下記の通りとなります。
        <!-- Spring Security -->
        <dependency>
            <groupId>org.springframework.security</groupId>
            <artifactId>spring-security-bom</artifactId>
            <version>${spring-framework.version}</version>
            <type>pom</type>
            <scope>import</scope>
        </dependency>
        <dependency>
            <groupId>org.springframework.security</groupId>
            <artifactId>spring-security-web</artifactId>
            <version>${spring-framework.version}</version>
        </dependency>
        <dependency>
            <groupId>org.springframework.security</groupId>
            <artifactId>spring-security-config</artifactId>
            <version>${spring-framework.version}</version>
        </dependency>
下記URLを参考にしました。
[blogcard url=”https://spring.pleiades.io/spring-security/site/docs/5.1.7.RELEASE/reference/html/get-spring-security.html”]web.xmlの変更
下記の通り追加しました。
-
設定ファイルを読み込むように設定します。(security-context.xml)
-
springSecurityFilterChainフィルターを設定します。
<?xml version="1.0" encoding="ISO-8859-1"?>
<web-app xmlns:xsi="http://www.w3.org/2001/XMLSchema-instance"
    xmlns="http://java.sun.com/xml/ns/javaee"
    xsi:schemaLocation="
            http://java.sun.com/xml/ns/javaee
            https://java.sun.com/xml/ns/javaee/web-app_2_5.xsd"
    id="WebApp_ID" version="2.5">

    <display-name>SpringWeb</display-name>

    <!-- - Location of the XML file that defines the root application context.
        - Applied by ContextLoaderListener. -->
    <context-param>
        <param-name>contextConfigLocation</param-name>
        <param-value>
            classpath:spring/application-config.xml
            <!-- (注意)security-context.xmlをspringSecurityFilterChainのフィルター宣言前に読み込まなければならない。 -->
            <!-- xml内で読み込むConfigurationでフィルターに必要なクラスを読み込んでいる。 -->
            classpath:spring/security-context.xml
        </param-value>
    </context-param>

    <!-- (ここから↓↓)Spring Bootでは必要ないが、Springではフィルターを宣言しないといけない。 -->
    <filter>
        <filter-name>springSecurityFilterChain</filter-name>
        <filter-class>org.springframework.web.filter.DelegatingFilterProxy
        </filter-class>
    </filter>

    <filter-mapping>
        <filter-name>springSecurityFilterChain</filter-name>
        <url-pattern>/*</url-pattern>
    </filter-mapping>
    <!-- (ここまで↑↑)Spring Bootでは必要ないが、Springではフィルターを宣言しないといけない。 -->

    <listener>
        <listener-class>org.springframework.web.context.ContextLoaderListener</listener-class>
    </listener>

    <!-- - Servlet that dispatches request to registered handlers (Controller
        implementations). -->
    <servlet>
        <servlet-name>dispatcherServlet</servlet-name>
        <servlet-class>org.springframework.web.servlet.DispatcherServlet
        </servlet-class>
        <init-param>
            <param-name>contextConfigLocation</param-name>
            <param-value>
                /WEB-INF/mvc-config.xml
            </param-value>
        </init-param>
        <load-on-startup>1</load-on-startup>
    </servlet>

    <servlet-mapping>
        <servlet-name>dispatcherServlet</servlet-name>
        <url-pattern>/</url-pattern>
    </servlet-mapping>

</web-app>
security-context.xmlの配置
「classpath:spring/security-context.xml」にsecurity-context.xmlを配置します。resourcesフォルダがクラスパスとなっているので、「resource/spring/security-context.xml」に配置します。
<?xml version="1.0" encoding="UTF-8"?>

<beans xmlns="http://www.springframework.org/schema/beans"
    xmlns:xsi="http://www.w3.org/2001/XMLSchema-instance"
    xmlns:mvc="http://www.springframework.org/schema/mvc"
    xmlns:context="http://www.springframework.org/schema/context"
    xmlns:sec="http://www.springframework.org/schema/security"
    xsi:schemaLocation="http://www.springframework.org/schema/mvc https://www.springframework.org/schema/mvc/spring-mvc.xsd
        http://www.springframework.org/schema/security http://www.springframework.org/schema/security/spring-security.xsd
        http://www.springframework.org/schema/beans https://www.springframework.org/schema/beans/spring-beans.xsd
        http://www.springframework.org/schema/context https://www.springframework.org/schema/context/spring-context.xsd">

    <!-- SecurityConfigクラスまでをコンポネートスキャンしている -->
    <context:component-scan
        base-package="com.pom2019.security" />

</beans>
設定ファイルの作成
security-context.xmlでコンポネートスキャンしたフォルダ内に設定ファイルを作成します。
package com.pom2019.security;

import org.springframework.beans.factory.annotation.Autowired;
import org.springframework.context.annotation.Bean;
import org.springframework.context.annotation.Configuration;
import org.springframework.security.config.annotation.authentication.builders.AuthenticationManagerBuilder;
import org.springframework.security.config.annotation.web.builders.HttpSecurity;
import org.springframework.security.config.annotation.web.configuration.EnableWebSecurity;
import org.springframework.security.config.annotation.web.configuration.WebSecurityConfigurerAdapter;
import org.springframework.security.crypto.bcrypt.BCryptPasswordEncoder;
import org.springframework.security.crypto.password.PasswordEncoder;

@Configuration          //コンフィギュレーションとして宣言する
@EnableWebSecurity      //Webセキュリティを有効にする
public class SecurityConfig extends WebSecurityConfigurerAdapter {

    @Autowired
    public void configureGlobal(AuthenticationManagerBuilder auth)
        throws Exception {
            //認証を簡素化する(パスワードはエンコードしないと実行時にエラーとなる)
            auth.inMemoryAuthentication().withUser("user")
              .password(passwordEncoder().encode("pass")).roles("USER");
    }

    @Override
    protected void configure(HttpSecurity http) throws Exception {
        http.authorizeRequests()
          //すべてのリクエストに対してBasic認証を行う
          .anyRequest().authenticated()
          .and().httpBasic();
    }

    //パスワードのエンコーダー
    @Bean
    public PasswordEncoder passwordEncoder() {
        return new BCryptPasswordEncoder();
    }
}
実行結果
認証ダイアログが表示されました。
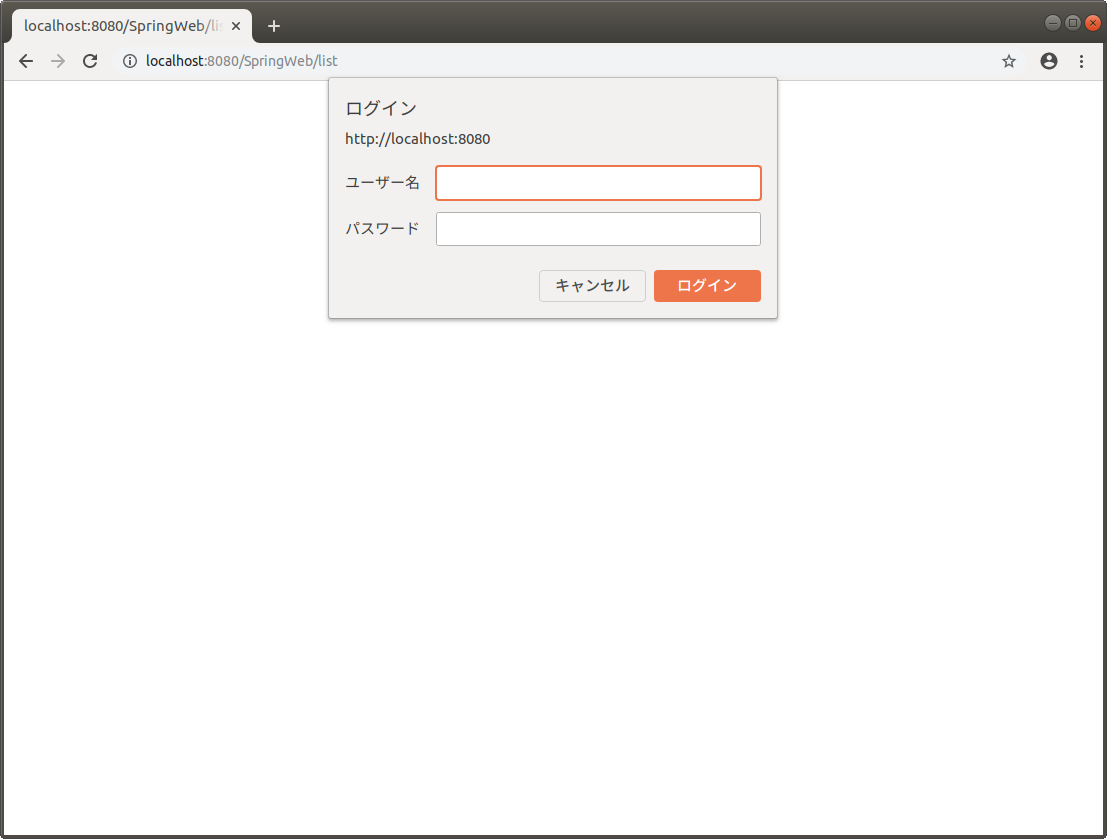
ユーザー名とパスワードを入力します。

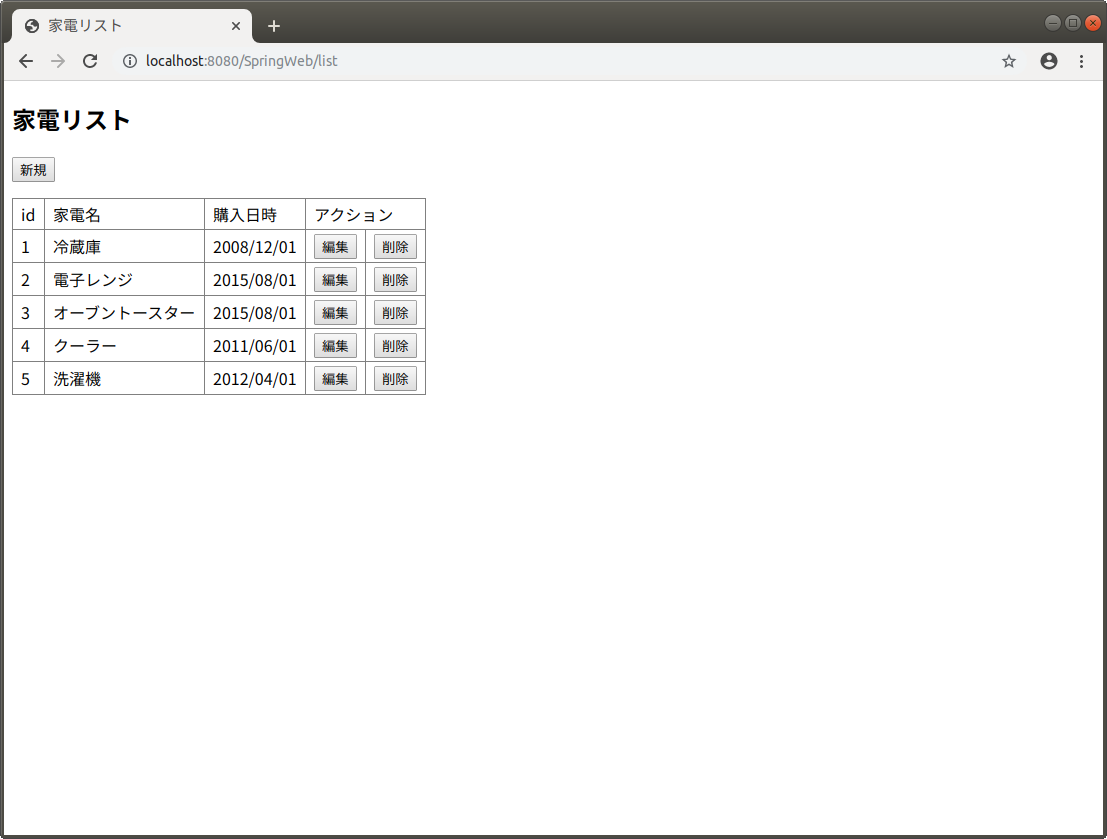
認証に成功しました!
まとめ
Basic認証をしておけば、ユーザー名とパスワードを知らなければアクセスすらできません。
高いセキュリティが要求される状況で役立ちそうです。
Basic認証の説明でもお伝えしましたが、Basic認証はhttpsと併用することをおすすめします。
最後までお読み頂きありがとうございました。


コメントを残す